Simple Way to Prepare Award-winning Mugaacha Birda
Hey everyone, I hope you're having an amazing day today. Today, I'm gonna show you how to make a special dish, Recipe of Any-night-of-the-week Mugaacha Birda. It is one of my favorites. This time, I will make it a bit tasty. This is gonna smell and look delicious.
Let's face it, cooking isn't a high priority at the lifestyles of every man, woman, or child on Earth. In fact, much too folks have forced understanding how to cook important in their own lives. This usually means that we frequently rely on power foods and boxed mixes rather than taking your time and effort to prepare healthy meals for our families and our own personal enjoyment.
The same is true for lunches once we often resort to a can of soup or box of macaroni and cheese or some other similar product as opposed to putting our creative efforts into creating an instant and easy yet delicious lunch. You may notice many thoughts in this article and the hope is that these ideas won't just get you off to a terrific beginning for ending the lunch rut most of us seem to find ourselves at at a certain point or another but also to use new things on your own.
The good thing is that when you've learned the basics of cooking it's unlikely that you will ever need to displace them. This means you can always build up and expand your cooking skills. As you know new recipes and better your culinary skills and talents you'll find that preparing your meals from scratch is a whole lot more rewarding than preparing pre packaged meals that are purchased from the shelves of your local supermarkets.
Many things affect the quality of taste from Mugaacha Birda, starting from the type of ingredients, then the selection of fresh ingredients, the ability to cut dishes to how to make and serve them. Don't worry if you want to prepare Mugaacha Birda delicious at home, because if you already know the trick then this dish can be used as an extraordinary special treat.
As for the number of servings that can be served to make Mugaacha Birda is 4-5 servings. So make sure this portion is enough to serve for yourself and your beloved family.
Just in addition, the time it takes to cook Mugaacha Birda estimated approx 30 min.
To get started with this recipe, we must prepare a few components. You can cook Mugaacha Birda using 16 ingredients and 26 steps. Here is how you can achieve it.
#indiankitchen
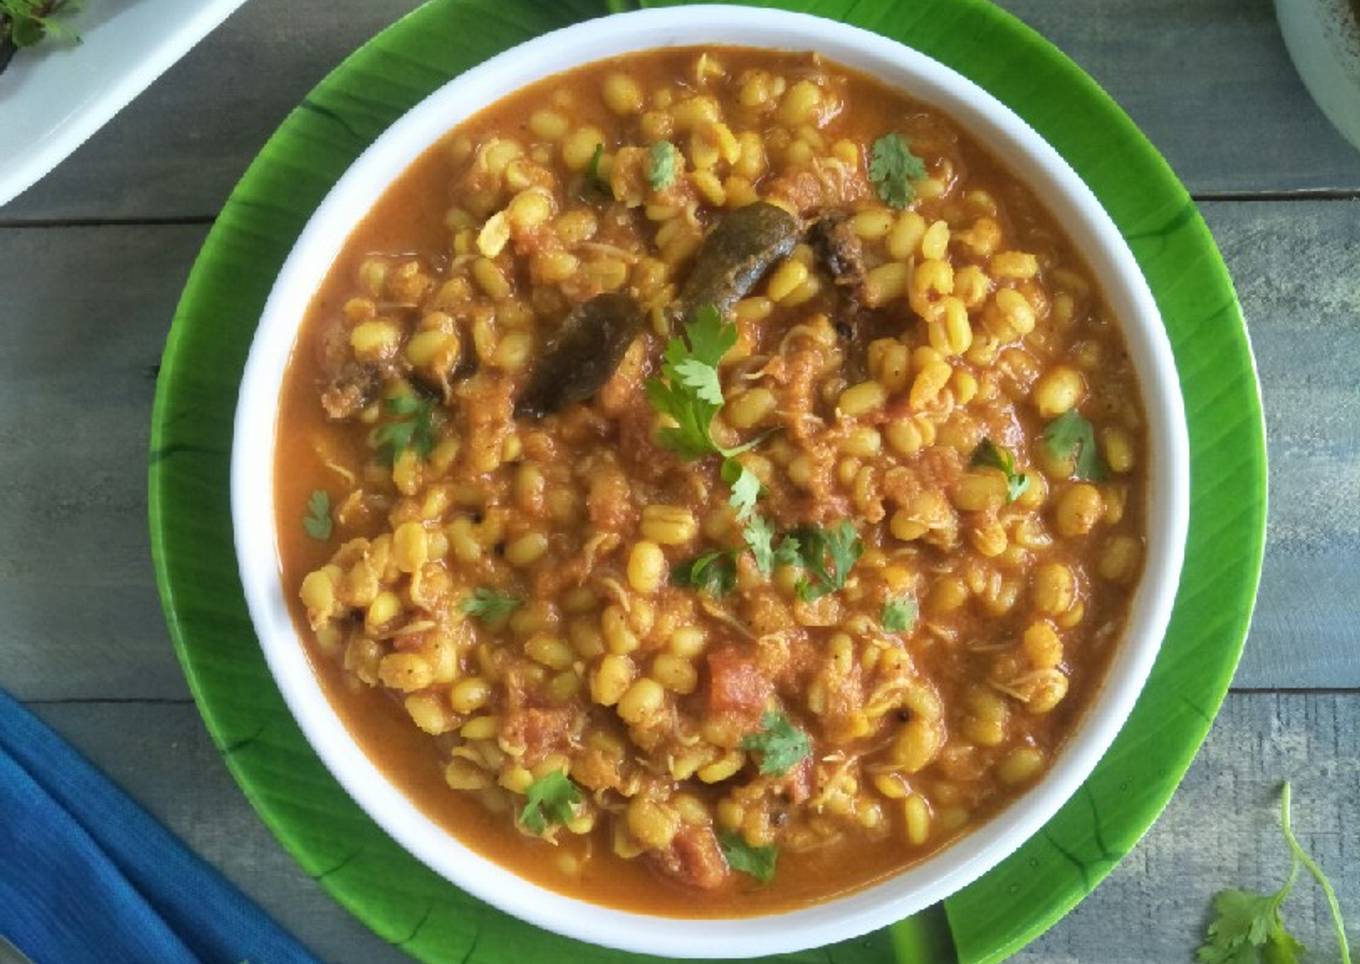
Mugaacha Birda is a no onion no garlic, gravy vegetable from Maharashtra. It is made using peeled, sprouted green moong and fresh coconut with some simple spices. The method and ingredients used in the preparation of this vegetable are fairly simple. But, the flavour is delicious and it scores high on the health quo too!
Shravan is observed by many in Maharashtra. In this month, Shravani somvaar (Monday) is the day when many such people fast and break their fasts with simple a meal which includes this vegetable alongwith varan, rice and aluwadi (sans onion and garlic).
Ingredients and spices that need to be Prepare to make Mugaacha Birda:
- 3/4 cup Whole Green Moong
- 1/2 cup Chopped Tomato (1 Small Tomato)
- 1 tsp Turmeric Powder
- 2 tsp Bedgi Red Chilli Powder
- 1 tsp Kashmiri Red Chilli Powder
- 2 tsp Dry Coriander Powder
- 4 tsp Jaggery …. To be adjusted
- To Taste Salt
- To Be Ground To A Paste :
- 3/4 cup Fresh Grated Coconut
- 1 1/2 tsp Cumin Seeds
- 1 tsp Tamarind
- For The Tempering :
- 2 tbs Oil
- 1 tsp Mustard Seeds
- 1 sprig Curry Leaves (8-10 leaves)
Instructions to make Mugaacha Birda
- To make the Mugaacha Birda, we first need to soak the whole green moong in sufficient water, two nights in advance.

- The next morning, rinse the moong well, and drain out all the water. Leave it in a warm place till night, for sprouting.

- At night, once again soak the moong sprouts in sufficient water till the next morning.

- In the morning, you will notice that maximum moong peels have collected at the top of the water and the moong have increased to almost 2 1/2 cups.

- Carefully discard those peels from the top and begin peeling the rest of the sprouts. Now, there is a specific technique for this.

- The vessel with the sprouts already has lots of water in it.
- Take an empty vessel. Place in on the platform. Make a cup of your right palm with a slight gap in the fingers and hold it over the empty vessel.

- Pick up the vessel containing the sprouts with your left hand and pour the water from it in the empty one through your palm.

- The peels which have come off, will be collected in the fingers of your right palm. Discard them.

- Pour this water again on the sprouts with a little force. This loosens the remaining peels.

- Repeat steps 7-10 till almost all the peels have come off.
- Whatever little peels are left, can be cleaned individually. Again, if some sprouts have gone into the peels then they too can be cleaned individually.

- Set aside the cleaned moong sprouts till further use.
Heat a saucepan and add the oil for tempering to it. When it heats up, add the mustard seeds.

- As soon as they splutter, add the asafoetida and the curry leaves.


- Next, add the turmeric powder and mix. Immediately add to it the de-skinned sprouted moong and stir.


- Add some water to it, a little above the level of the moong.

- Now add the red chilli powders and the coriander powder and mix well. Bring the gravy to a rolling boil.


- Reduce the flame to low medium and cover and cook for a while stirring occasionally.

- When the moong are half cooked, add the chopped tomato and stir. Again cover and cook further for some time.

- In the meantime, grind together the grated coconut, cumin seeds and tamarind, using sufficient water to get a smooth paste.

- Check the moong. If they are almost cooked, i.e. just a little firmness is remaining, then add the coconut paste, jaggery and salt to taste.

- Give it a good stir, add some water if required to get a medium thick gravy and bring it to a boil again on high heat, stirring occasionally.

- Once it reaches a rolling boil, reduce the heat to minimum and simmer for about eight to ten minutes, uncovered.

- This will ensure that the coconut is well cooked and the moong too will be perfectly cooked and won’t become too mushy.
- Switch off the flame and garnish with fresh chopped coriander leaves.
- Serve this traditional and totally delicious Mugaacha Birda with some phulkas, daal rice and aluwadis!

You will also find as your experience and confidence develops that you will see your self increasingly more frequently improvising as you proceed and adjusting meals to fulfill your own personal preferences. If you'd like less or more of ingredients or would like to make a recipe somewhat less or more hot in flavor you can make simple adjustments on the way in order to achieve this goal. Put simply you will start punctually to create recipes of one's individual. And that's something that you will not of necessity learn when it has to do with basic cooking skills for novices however you'd never learn if you didn't master those basic cooking skills.
So that's going to wrap this up with this exceptional food How to Prepare Perfect Mugaacha Birda. Thank you very much for reading. I'm confident that you will make this at home. There is gonna be interesting food at home recipes coming up. Don't forget to save this page in your browser, and share it to your loved ones, colleague and friends. Thanks again for reading. Go on get cooking!